Segmentation app#
idtracker.ai provides a graphical application to help you set the correct parameters for your videos before tracking. The key task here is to achieve a good video segmentation: every animal must appear as exactly one blob, with no spurious detections from reflections, shadows, or other objects.
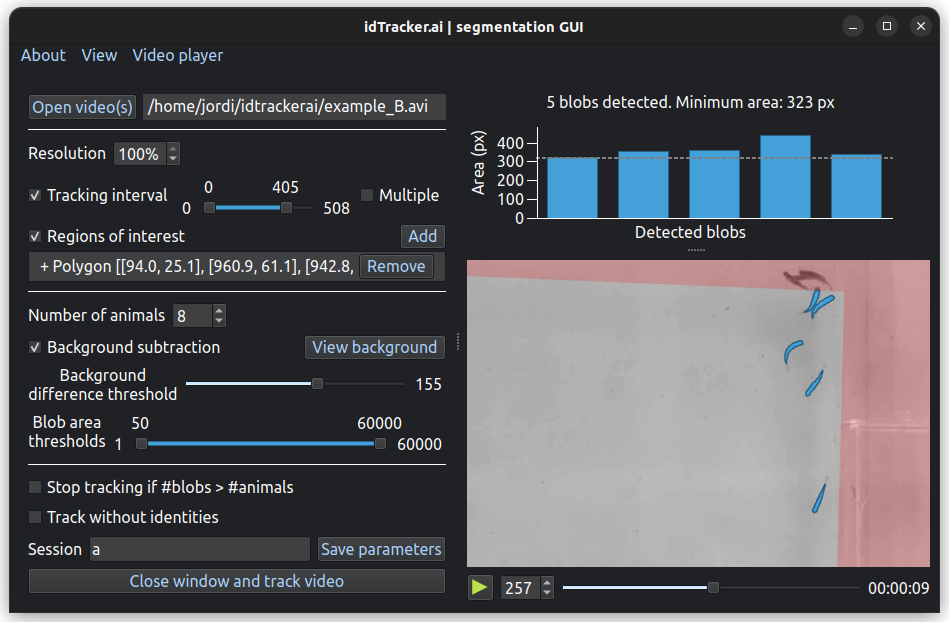
idtracker.ai’s segmentation application (in dark mode)#
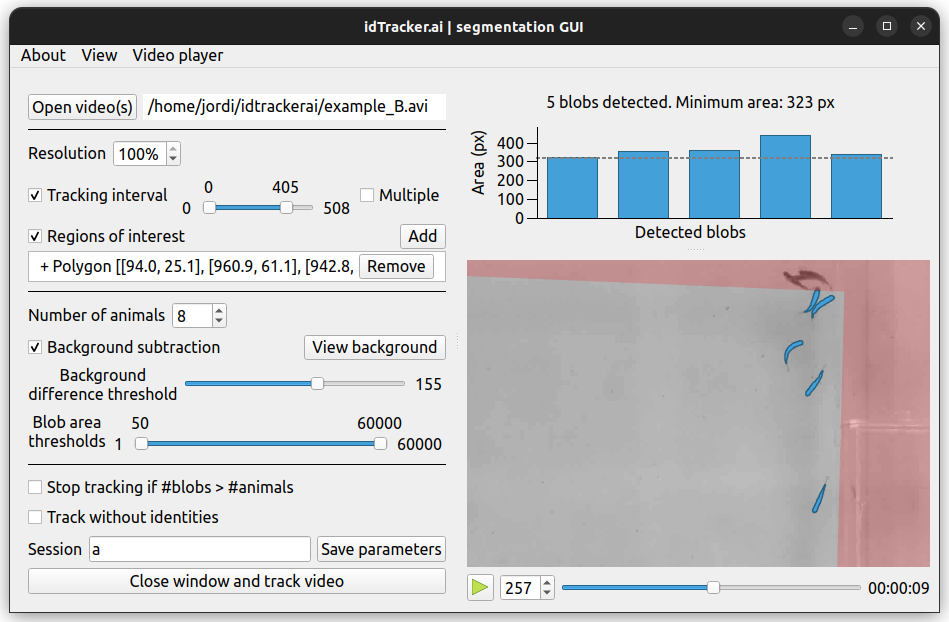
idtracker.ai’s segmentation application (in light mode)#
The left panel contains all the tracking parameter controls. The right panel shows the video player and a bar plot above it. Detected blobs appear as blue polygons in the video player; their areas are plotted in the bar plot. Adjust the parameters until the segmentation is correct, then start tracking.
Make sure that:
All animals appear as blobs when they are in frame
Every blob is an animal (no reflections nor external objects are detected as blobs)
Adjust the tools in the app to get an accurate segmentation and idtracker.ai will do the rest.
Segmentation Tools#
Here is a detailed description of every tool in the app:
Tip
The best way to learn how to use the app is to explore it. Every tool presents a tooltip when the cursor hovers over it, give it a try!
Open…#
Click “Open…” to browse your folders and load a video or a TOML parameters file. You can also select more than one video file to track them sequentially. This is intended for tracking multiple video clips of the same experiment as if they were concatenated. You can also drag and drop these input files directly to the GUI to open them in the same way.
Once a video file is loaded, its file path will appear next to the button. If multiple files were selected, they will appear in order, and you can rearrange them by drag and drop. Clicking on the video paths will set the video player to the first frame of the clicked video (useful to check continuity between videos).
Tracking interval#
Optionally, define one or more tracking intervals (specified as frame numbers). Frames outside all defined intervals are skipped; their trajectory values will be NaN.
Regions of interest#
To avoid undesired blobs, a ROI can be defined. The user can draw polygons or ellipses on the video player to define positive regions (where to look for blobs) or negative regions (where NOT to look for blobs). The negative ROIs will appear in red in the video player.
To set a region of interest:
Activate the tool by checking “Regions of interest”.
Click “Add” to start adding a new ROI.
Select the desired ROI style (Polygon/Ellipse, Positive/Negative).
Start drawing the vertices of the desired shape by clicking on the video player (left click to add points and right click to erase them).
Press Enter (or click again “Add”) to finish editing the ROI.
Click any ROI on the list to highlight it on the video player and click “Remove” to eliminate it.
Drag and drop the existing ROIs to reorder.
Warning
When this tool is enabled but no ROIs have been drawn, the entire video area is treated as a negative ROI — meaning no blobs will be detected. Add at least one positive ROI to define where animals should be found.
Exclusive Regions of Interest#
When more than one isolated Regions of interest are defined, this feature enforces each identity to remain within a single region. During the first identity assignment (using the best global fragment), each identity is bound to a specific region; detections outside that region are rejected.
This is intended for videos with multiple isolated arenas where animals cannot move between them.
Note
This option corresponds to the exclusive_rois parameter in TOML files (see Terminal usage).
Number of animals#
Set the number of animals present in the video.
The number of animals can be left undefined (set to 0) when using Track without identities, though providing it is still recommended because it improves individual-vs-crossing blob classification.
Background subtraction and intensity thresholds#
idtracker.ai can segment the video in two ways, with or without subtracting the background.
Without background subtraction. The video is segmented using the brightness value of each pixel. Any cluster of pixels whose brightness lies between the intensity thresholds (from 0 (black) to 255 (white)) will be considered a blob. For videos where animals appear as dark blobs on a bright background, set the lower intensity threshold to minimum. Otherwise, if animals appear as bright blobs on a dark background, set the upper intensity threshold to maximum.
With background subtraction. The video is segmented using the absolute difference of brightness value between each pixel and the background. Any cluster of pixels whose absolute brightness difference with the background is greater than the Background difference threshold will be considered a blob.
The computed background depends on the tracking intervals and the video paths. Any modification of these two parameters will reset the computed background, so the user will have to reactivate it manually.
Area thresholds#
Set the minimum and maximum blob area (in pixels). Blobs outside this range are discarded and will not be tracked.
Stop tracking if #blobs > #animals#
The presence of frames with more blobs than animals in the video indicates a bad segmentation with non-animal blobs detected. idtracker.ai is not built to handle non-animal blobs (noise blobs). These can contaminate the algorithms, making identification harder. To ensure proper segmentation, check this option. idtracker.ai will abort the tracking session if a bad segmentation is detected (this will happen when running the tracking).
Track without identities#
Check this box to obtain position trajectories without consistent identities across the video. The CNN-based identification step is skipped entirely, so the label assigned to each animal can change over time — in particular, identity is not preserved through crossings or occlusions. Use this mode when you only need position data (not individual re-identification).
If checked, the Number of animals can be left undefined (set to 0). Even so, providing the number of animals is recommended because it improves the individual-vs-crossing blob classification.
Session name#
Type the name of the tracking session here. A folder named session_[SESSION NAME] will be created in the same folder as the video. All the generated data from the tracking session will be saved in this folder (see Output structure). If left empty, the session name will be set as a combination of the video file names.
Save parameters#
Click Save parameters to save the tracking parameters from this app into a .toml file. You can use this .toml file to reopen the session in the future. You can also use it to start tracking directly from the terminal (see Terminal usage).
Close window and track video#
Click to close the segmentation app and immediately begin tracking with the current parameters. The tracking progress will appear in the terminal. Equivalent to saving the parameters to a TOML file and running idtrackerai --load parameters.toml --track.
Segmentation shortcuts#
Key |
Action |
|---|---|
Q |
Quit the app |
Ctrl + O |
Open video(s) or TOML file |
Ctrl + S |
Save parameters |
Space |
Play/pause video player |
1 - 9 |
Change the video playback speed |
Ctrl + L |
Toggle playback framerate limit |
Right / D |
Move video playback forward |
Left / A |
Move video playback backward |
Enter |
Accept ROI when drawing |
Ctrl + + |
Increase font size |
Ctrl + - |
Decrease font size |